One of the biggest quality of life improvements when it comes to deploying over the past few months has been learning how to use Kamal and have learnt to use it properly without getting lost in the complexities.
Kamal is a simple tool for deploying web apps to any server using Docker containers with zero downtime. Although originally developed for use with Rails, it can be used to deploy just about any web application to the web.
Best thing about it, is it can be setup on a new VPS without expecting you to even log into your server - Kamal does everything for you, making it truly Zero Configuration Deployment on your server. With the latest Kamal, 2.8.2 it's even easier as you don't even need to worry about having access to a Docker registry.
In this example I will show you how you can deploy a NextJS application using Kamal onto a brand new VPS. My VPS provider of choice nowadays is Hetzner, but you can use any provider of your choice as long as it can run a Linux based operating system.
It's fairly easy to get started and the barrier is fairly low, but I'll assume you've can find your way around development environments.
They are as follows:
💡Assumptions
- You use MacOS, Linux or use WSL on Windows.
- Have Docker installed
- Have a VPS setup and can login as root with only your SSH keys.
- A domain with DNS setup pointing to your VPS's IP Address.
- Are familiar with NextJS - but I'll setup everything step by step so that by the end of this guide you can deploy projects beyond NextJS.
- Have some familiarity around terminal and a code editor. I'm using the default terminal on MacOS and VSCode.
- Have Ruby installed on your machine - MacOS and certain Linux distributions have it preinstalled.
- Some git knowledge.
If you don't want to follow the guide and simply look at the end code, you can find it in the repository which is a snapshot of everything included in this tutorial
Now summon your terminal of choice.
I'll be creating a new NextJS project called next-kamal, by running npx create-next-app@latest next-kamal in my folder of choice and install with all defaults. You can call it anything or use an existing NextJS project.
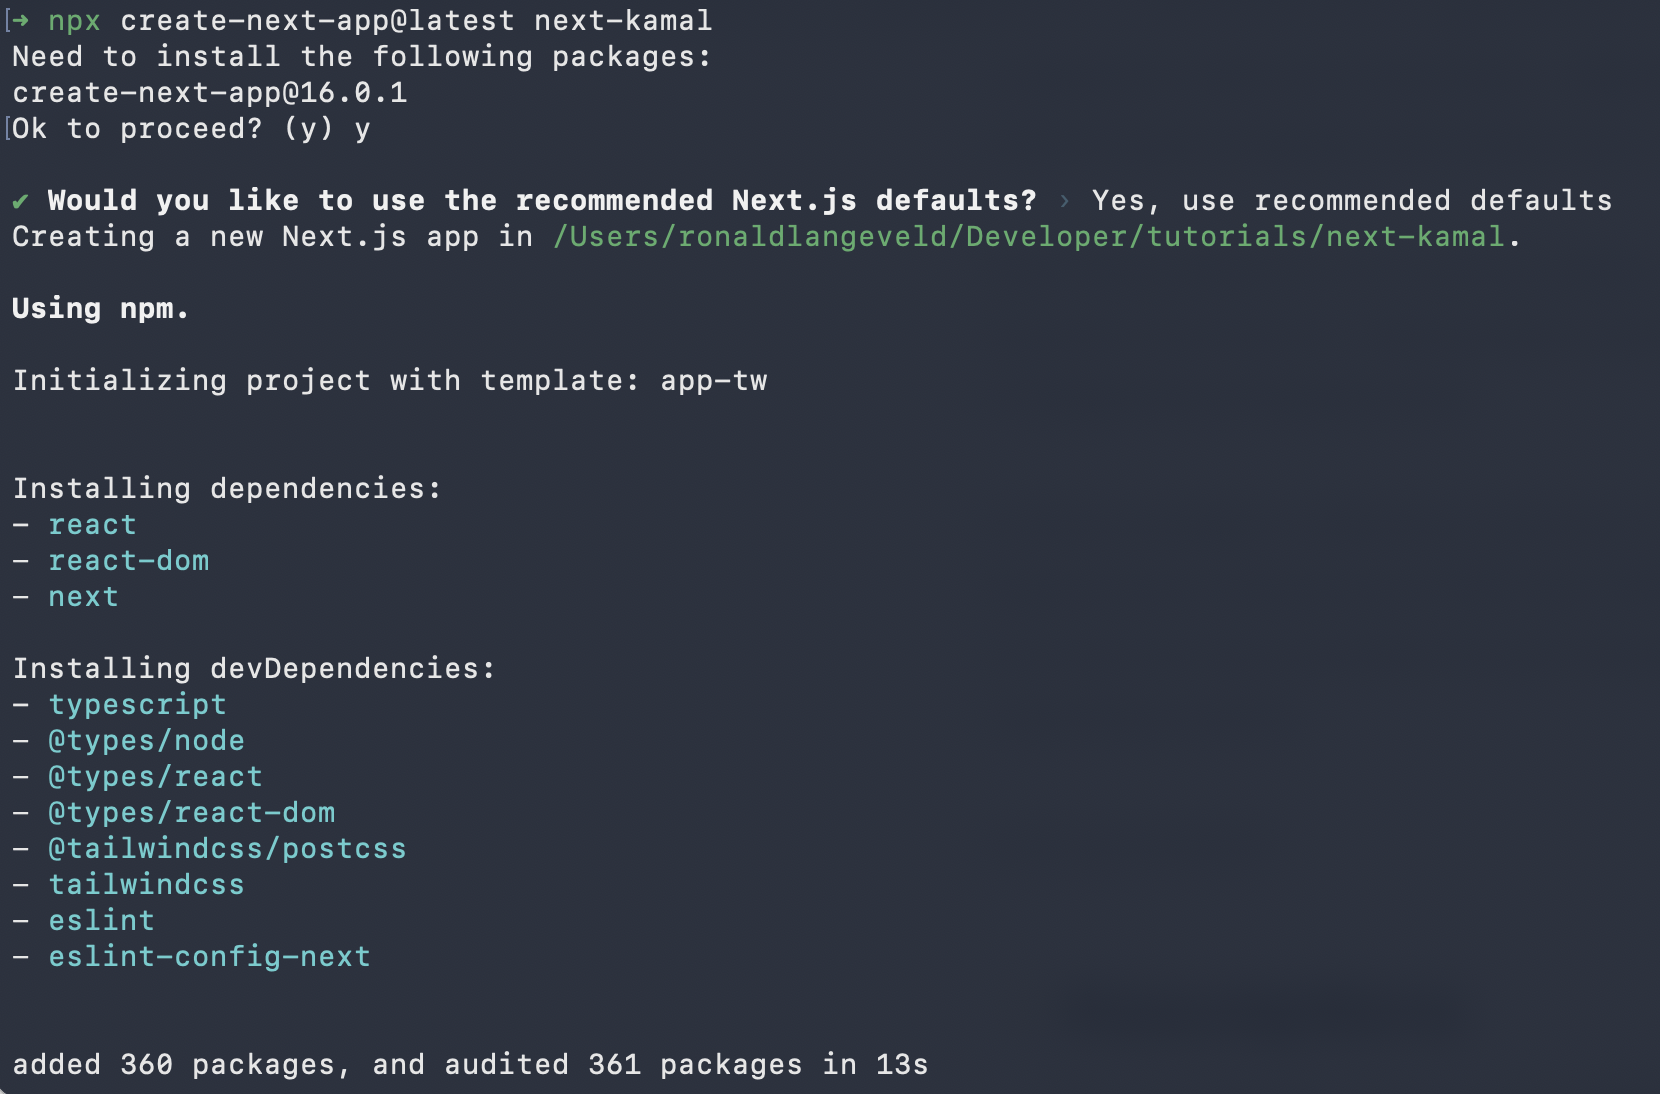
Also, while we're in the terminal, run gem install kamal to install Kamal on your system globally. For more information check out the official installation guide.
Now let's run the NextJS app locally just to ensure it installed correctly with npm run dev.
Once that is done, I will open next-kamal in VSCode.
Now let's focus on Kamal.
First things first, I will run kamal init.
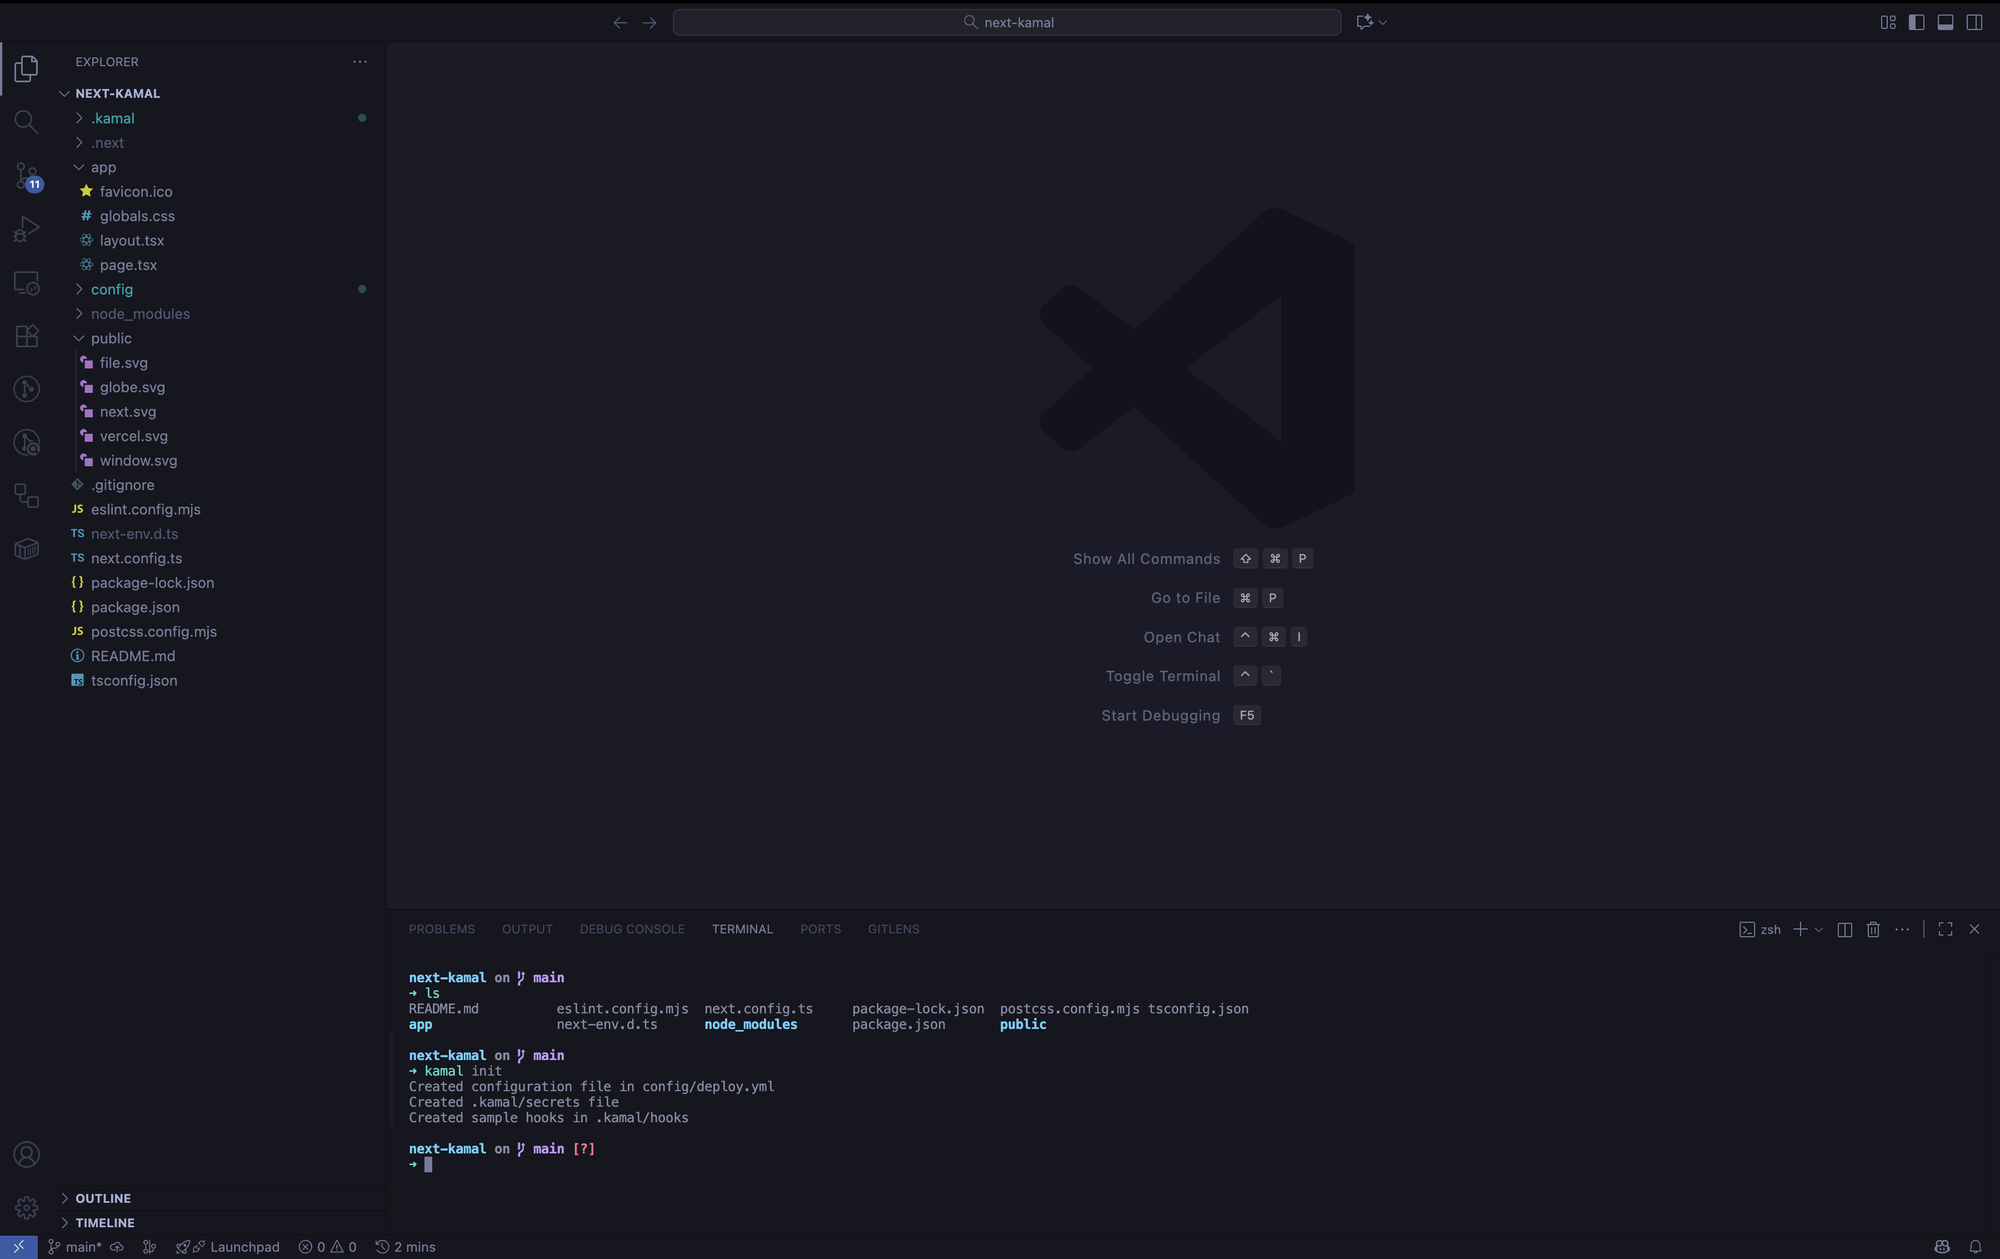
This will scaffold a few files and folders namely .kamal, config/ and a deploy.yml. No need to worry about them for now.
Since Kamal is Docker based, we need to setup a Dockerfile in our project. Vercel provides us with a Dockerfile that we can use pretty much as-is from their Github repository, and we'll go ahead and copy that as is into our project.
# syntax=docker.io/docker/dockerfile:1

FROM node:20-alpine AS base

# Install dependencies only when needed
FROM base AS deps
# Check https://github.com/nodejs/docker-node/tree/b4117f9333da4138b03a546ec926ef50a31506c3#nodealpine to understand why libc6-compat might be needed.
RUN apk add --no-cache libc6-compat
WORKDIR /app

# Install dependencies based on the preferred package manager
COPY package.json yarn.lock* package-lock.json* pnpm-lock.yaml* .npmrc* ./
RUN \
  if [ -f yarn.lock ]; then yarn --frozen-lockfile; \
  elif [ -f package-lock.json ]; then npm ci; \
  elif [ -f pnpm-lock.yaml ]; then corepack enable pnpm && pnpm i --frozen-lockfile; \
  else echo "Lockfile not found." && exit 1; \
  fi


# Rebuild the source code only when needed
FROM base AS builder
WORKDIR /app
COPY --from=deps /app/node_modules ./node_modules
COPY . .

# Next.js collects completely anonymous telemetry data about general usage.
# Learn more here: https://nextjs.org/telemetry
# Uncomment the following line in case you want to disable telemetry during the build.
# ENV NEXT_TELEMETRY_DISABLED=1

RUN \
  if [ -f yarn.lock ]; then yarn run build; \
  elif [ -f package-lock.json ]; then npm run build; \
  elif [ -f pnpm-lock.yaml ]; then corepack enable pnpm && pnpm run build; \
  else echo "Lockfile not found." && exit 1; \
  fi

# Production image, copy all the files and run next
FROM base AS runner
WORKDIR /app

ENV NODE_ENV=production
# Uncomment the following line in case you want to disable telemetry during runtime.
# ENV NEXT_TELEMETRY_DISABLED=1

RUN addgroup --system --gid 1001 nodejs
RUN adduser --system --uid 1001 nextjs

COPY --from=builder /app/public ./public

# Automatically leverage output traces to reduce image size
# https://nextjs.org/docs/advanced-features/output-file-tracing
COPY --from=builder --chown=nextjs:nodejs /app/.next/standalone ./
COPY --from=builder --chown=nextjs:nodejs /app/.next/static ./.next/static

USER nextjs

EXPOSE 3000

ENV PORT=3000

# server.js is created by next build from the standalone output
# https://nextjs.org/docs/pages/api-reference/config/next-config-js/output
# ENV HOSTNAME="0.0.0.0"
CMD ["node", "server.js"]
Kamal will use this build steps as a base for your project, at the end Kamal will forward this container. One thing you can do is comment out (or remove) the ENV HOSTNAME since that will be a concern for Kamal later.
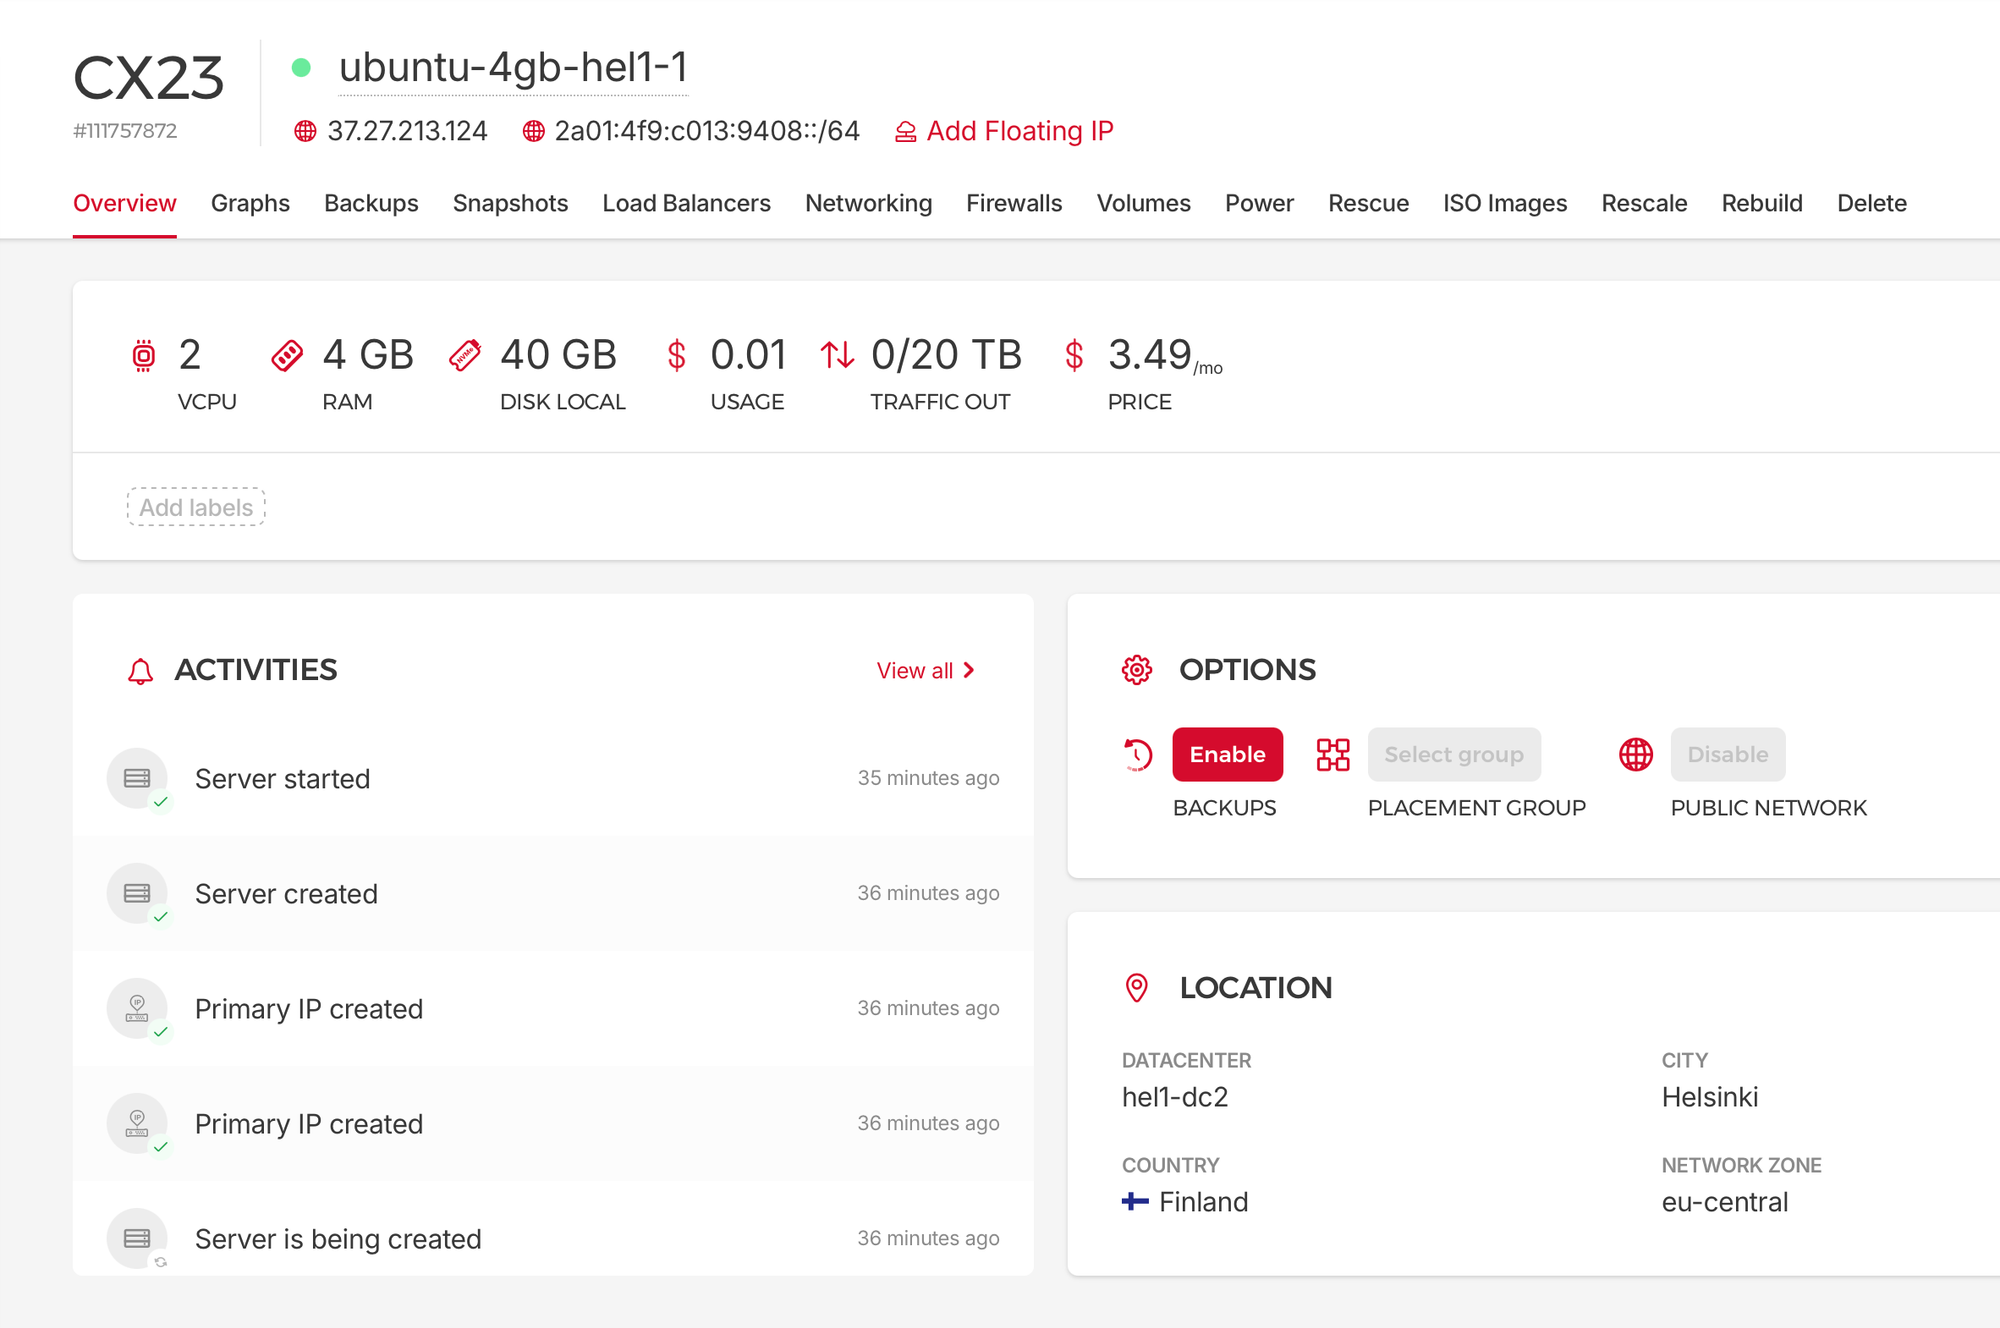
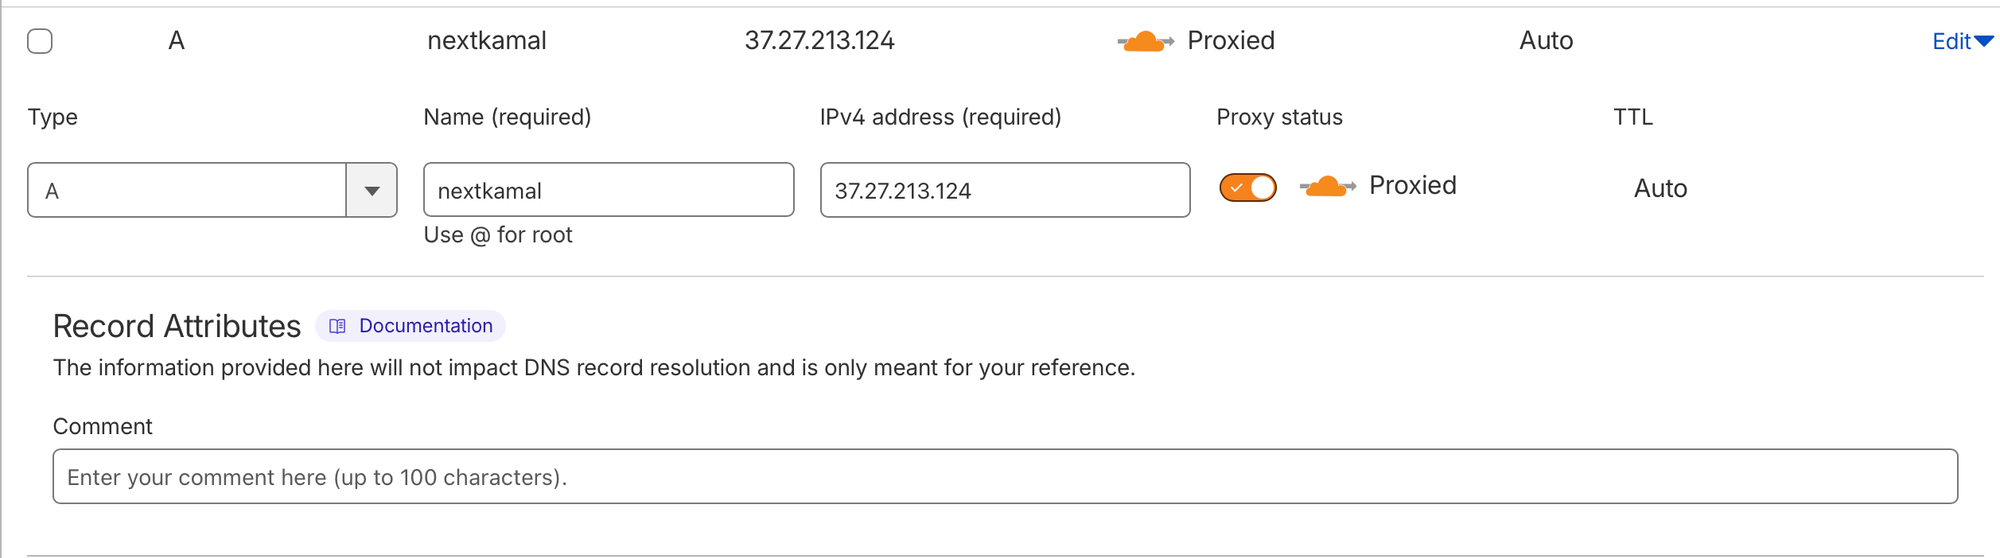
Next up, head over to your VPS host and get your server's IP Address. In my case it's 37.27.213.124.
If you haven't yet, now is a good time to point your domain to your server's IP address via your domain registrar.
We now need to populate our deploy.yml. This file is the heart of Kamal and acts as both the proxy configuration (think Nginx, Apache, Traefik etc), but also like a docker-compose all together. If you don't know what that is, don't worry too much about it.
Update your deploy.yml to roughly match this snippet:
# deploy.yml
# Name of your application. Used to uniquely configure containers.
service: my-next-app

# Name of the container image.
image: my-next-app

# Deploy to these servers.
servers:
  web:
    - 37.27.213.124
  # job:
  #   hosts:
  #     - 192.168.0.1
  #   cmd: bin/jobs

# Enable SSL auto certification via Let's Encrypt and allow for multiple apps on a single web server.
# Remove this section when using multiple web servers and ensure you terminate SSL at your load balancer.
#
# Note: If using Cloudflare, set encryption mode in SSL/TLS setting to "Full" to enable CF-to-app encryption.
proxy:
  ssl: true
  host: nextkamal.ronald.ink
  # Proxy connects to your container on port 80 by default.
  app_port: 3000
For this simple tutorial the only lines you need to touch is probablyservice , image, web and proxy inside your deploy.yml. The name of the service and image can be pretty much anything. Notice, app_port needs to be uncommented. By default it will be commented.
Now, make sure Docker is running on your computer. All that's left is to run kamal setup in your terminal from the root directory of your project.
Run it and wait for everything to complete before moving on.
Now if you followed this tutorial step by step you probably also get this error. I decided to include it because it's not well documented elsewhere and it's somethig nice to learn, catch early and get used to.
The thing is, Kamal will only push changes that you have committed via git (it doesn't need to have been pushed to a remote repository).
So go ahead and make a commit, I'll just commit everything:
git add .
git commit -m "Added kamal configs"
Now go ahead and run kamal setup again.
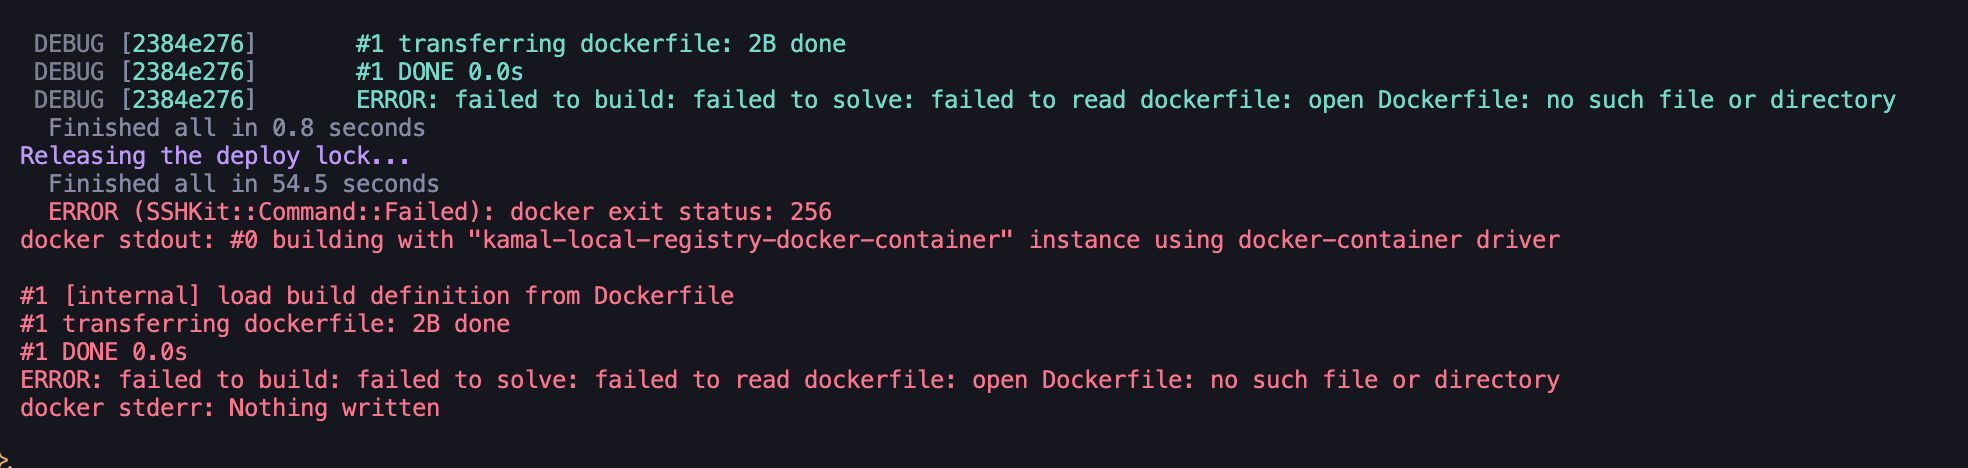
As it turns out, we have a different error this time:
#21 ERROR: failed to calculate checksum of ref ynp0ra4asni8b66bpcy9w7tpp::yy7pjlflbav0282kte32wd0vl: "/app/.next/standalone": not found
------
 > [runner 5/6] COPY --from=builder --chown=nextjs:nodejs /app/.next/standalone ./:
------
Dockerfile:54
--------------------
  52 |     # Automatically leverage output traces to reduce image size
  53 |     # https://nextjs.org/docs/advanced-features/output-file-tracing
  54 | >>> COPY --from=builder --chown=nextjs:nodejs /app/.next/standalone ./
  55 |     COPY --from=builder --chown=nextjs:nodejs /app/.next/static ./.next/static
  56 |
--------------------
ERROR: failed to build: failed to solve: failed to compute cache key: failed to calculate checksum of ref ynp0ra4asni8b66bpcy9w7tpp::yy7pjlflbav0282kte32wd0vl: "/app/.next/standalone": not found
docker stderr: Nothing written
We need to make a change in NextJS's configuration, next.config.ts to build it as a standalone. Add output: 'standalone'.
import type { NextConfig } from "next";

const nextConfig: NextConfig = {
  /* config options here */
  output: 'standalone',
};

export default nextConfig;
Now commit those changes
git add .
git commit -m "Added output settings to Next config"
And once again lets to kamal setup.
This might take about 2 minutes till you hit one more error:

Failed to become healthy it says??
So unlike Rails, that has a built in health check route, NextJS is pretty minimal and doesn't have a health routes built in by default.
Under the hood, Kamal will attempt to request an /up route to check if the site it healthy. If you don't have that in your project, you will come across the health check error, assuming everything else is fine.
We can override that setting for our purpose by letting it use our root url path of our web application instead.
Add the healthcheck settings to your deploy.yml.
#deploy.yml

proxy:
  ssl: true
  host: nextkamal.ronald.ink
  # Proxy connects to your container on port 80 by default.
  app_port: 3000
  healthcheck:
    path: "/"
    interval: 15
    timeout: 10
Let's commit those changes and try again.
git add .
git commit -m "Added health check to deploy.yml"
Now one more time run kamal setup.
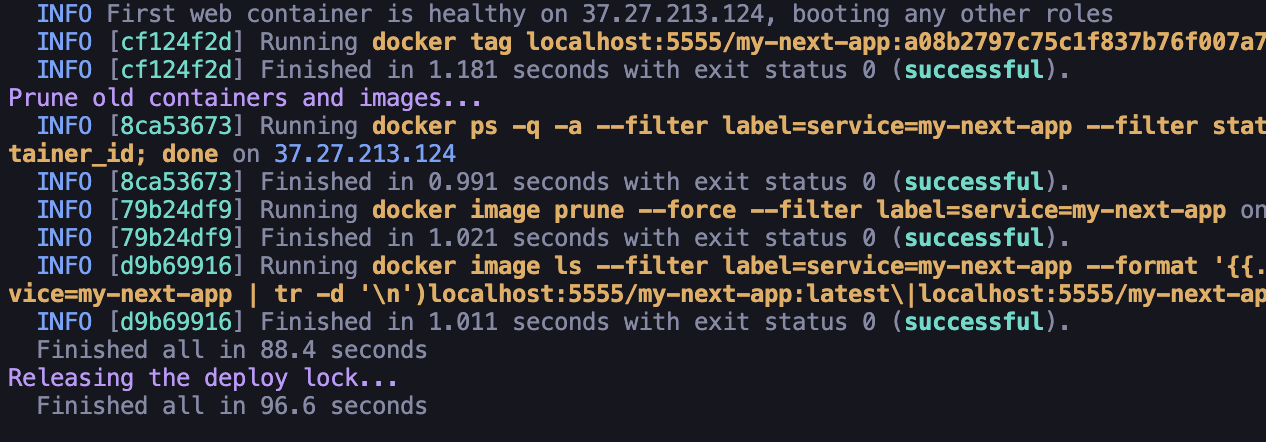
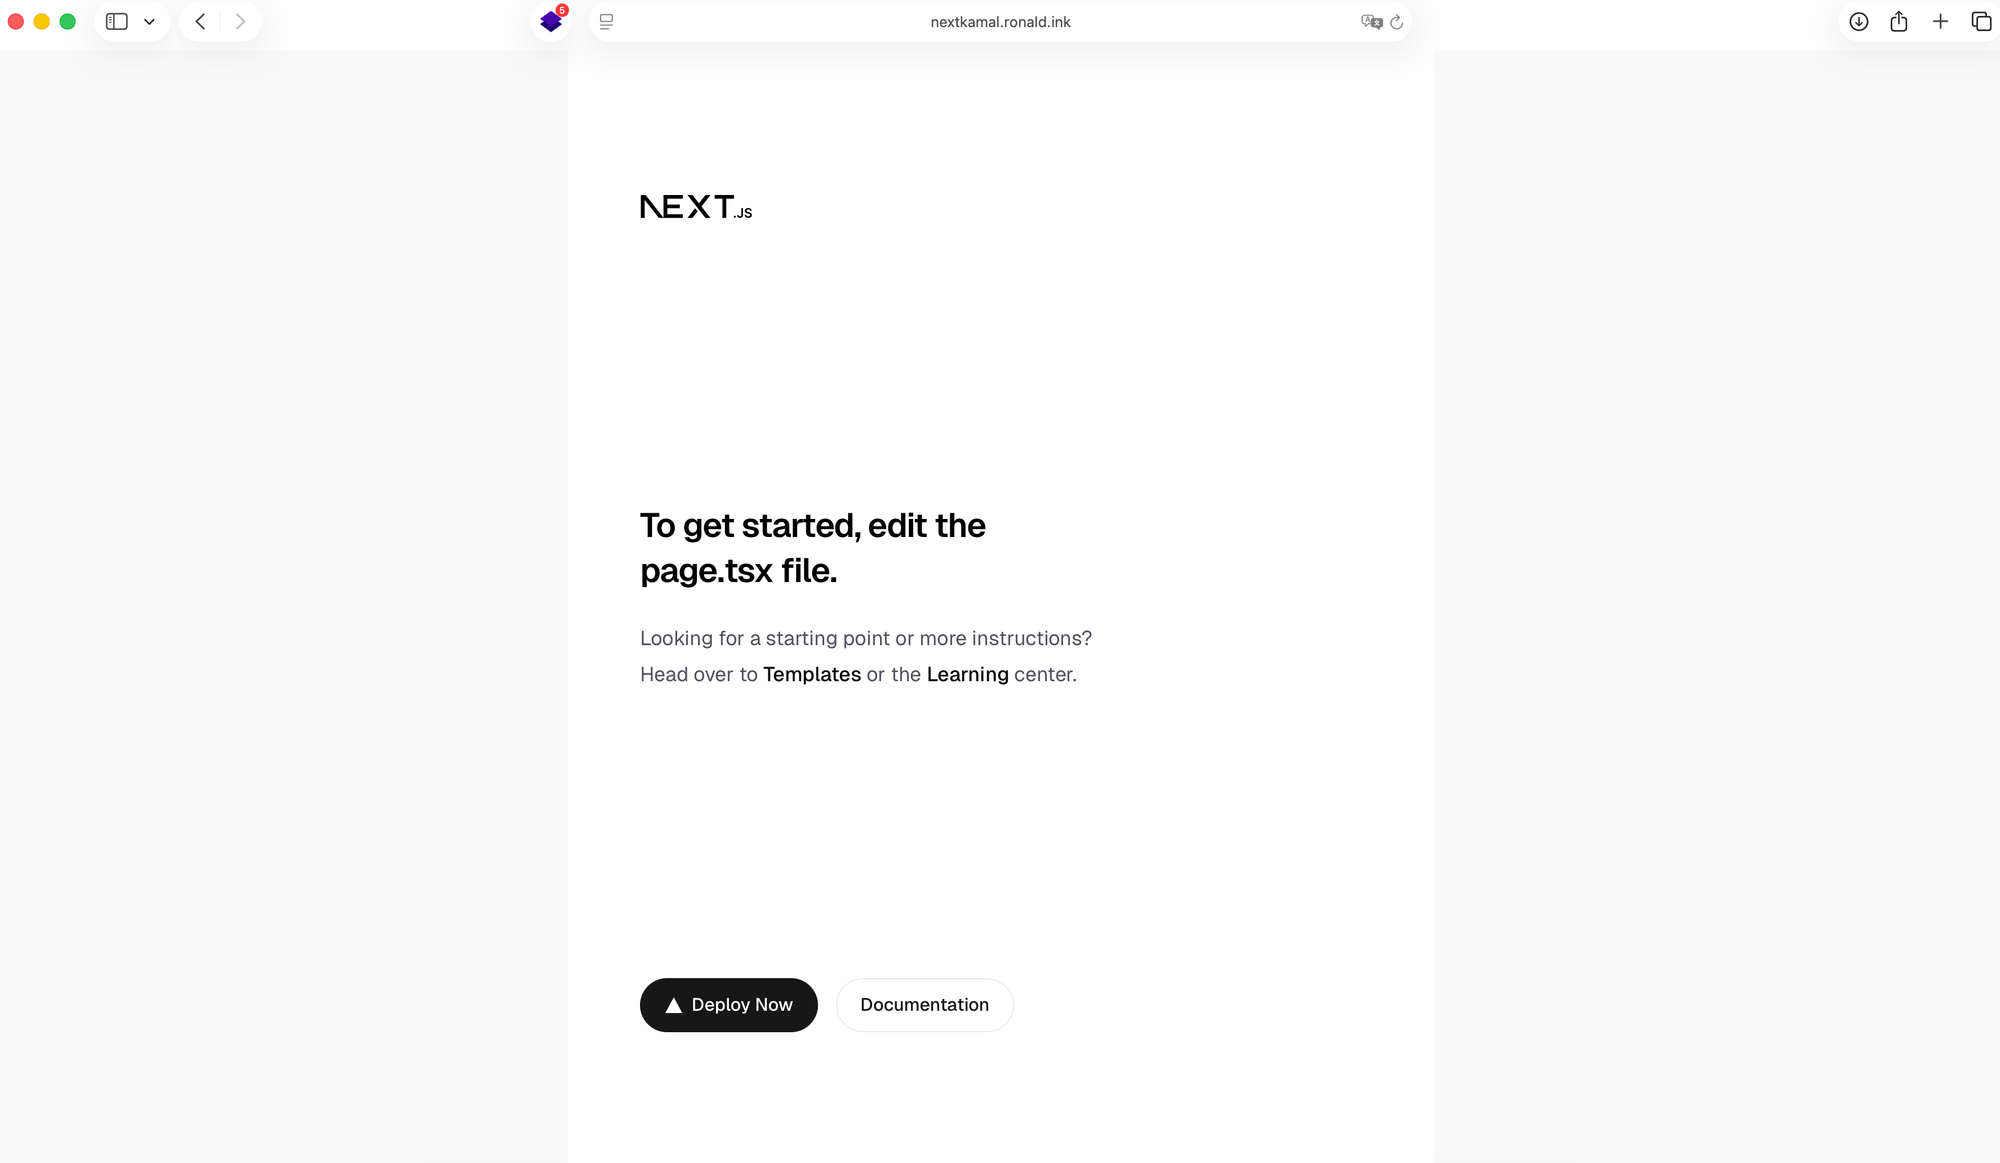
This time, if everything is as expected, you now have a NextJS app deployed to your VPS! Head over to your domain where you set it up and it should render!
The reason for the health check is that Kamal will first check the health of the new container before making it live it ensure your site doesn't go down in case it doesn't deploy as expected.
Now that you have your VPS instance setup with Kamal, subsequent Kamal deployments can be fired by running kamal deploy. It's that easy! Like having Heroku or Vercel all from your terminal.
So it might be a touch more involved initially than say deploying via Vercel, but it's on your own infrastructure and open doors to things that's not possible when deploying via "serverless" environments, such as storing media assets directly on the server, using SQLite with NextJS, kinda Pieter Levels style but NextJS instead of PHP - more on this in a future tutorial so add your email address and you'll be first to know!
That being said, I will also show you how to deploy other website stacks with Kamal in the coming weeks such as PHP, Django (Python), NestJS and more! If you have any other suggestions, comment below!